by Sam Tackeff | Dec 16, 2017 | Ingredients, Meal Planning, Quick and Easy, Shopping
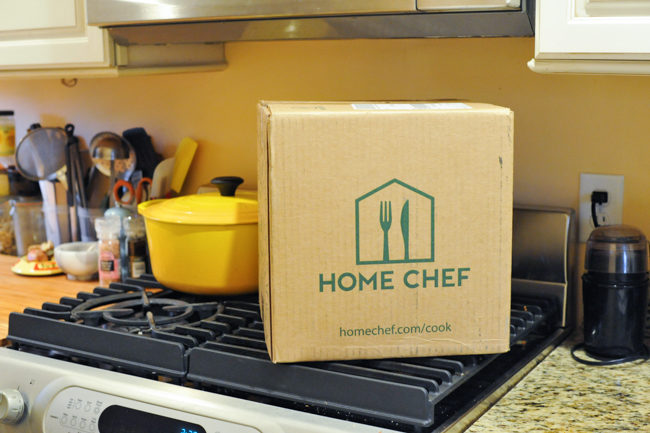
Well hello there! What’s cooking? I’m back in the kitchen today with a quick profile of another meal kit delivery service for your reading pleasure.
This installment? I try it: a week of “Home Chef”.
A few years back I took on a new kitchen challenge: to cook, taste, and review a variety of meal kits. In a sea of meal kits, I wanted to answer the age old question of: which meal kit is the best on the market right now?
Among the initial entrants, I tried Sakara (not actually a kit – it’s really $$$ organic meal delivery), Purple Carrot (vegetarian), and then many months of Blue Apron which I was then too lazy to cancel. On the plus side, it was good for a more comprehensive review, which you can read here.
At the end of the day, I found that cooking meal kit takes me a lot more effort than doing my own meal planning, shopping, and cooking. It’s also a good amount of waste packaging wise. And truthfully, I’m a better and more creative cook.
Nevertheless, I’m still charmed by the appeal of having a box of goodies show up on my doorstep and someone occasionally taking over the mealtime decision making, so I’m continuing my mini quest and trying different boxes every so often in order to share with you all, dear readers.
Disclosure: Home Chef knows nothing about me, but I did get a free box through their refer a friend program, and the links to Home Chef are affiliate links which give you $30 off your kit, and give me more free food. (If you order enough kits, you can send a free box to a friend; on par with most of the other meal kit customer acquisition programs.)
The details:
Home Chef Box overview – Home Chef is a more general meal kit without any particular slant. I’d characterize them as American home cooking with a hint of global food exploration but nothing overly fussy or too adventurous for the average palate. The company is based in Chicago, and has raised 57 million through series b (see Crunchbase), which is about a quarter of the funding of Blue Apron who was just shy of 200 million pre IPO and less compared to HelloFresh’s 365 million pre IPO.
How much does Home Chef cost?
This is a little complicated: $9.95 per serving – two servings of two dishes in the box; although you can add on lunches (most are $7.99/serving), seasonal fruit ($4.95/serving), or a smoothie ($4.95/serving) as extra which is a nice touch. If you glance, it’s not totally clear that the add ons will charge you for two servings. You can also choose some weeks from “Premium Meals” which seem to include bigger pieces of steak or lamb for 19.95 a serving, but these aren’t offered every week. And if your order is under a certain amount, you get charged the $10 for shipping. So the minimum box comes in at around $49.80 and goes up from there.
What kind of meat and produce does Home Chef have?
Generally, I found Home Chef’s to have an overall decent quality of produce and meat, although, notably NOT organic. (Most of my personal purchasing is organic and I get my vegetables and meat from a farm share; so I don’t think I’d get the box regularly for this reason alone.) Nothing seemed wilted or bruised, and generally everything was tasty. The fresh sausage packed in the lasagna skillet likely wouldn’t have past the two days I waited to cook it though even though it suggests that it would last 6 days on the recipe card.
The service strikes me as less “foodie” focused compared to, say, Blue Apron’s inserts about the farms and farmers (which sometimes strikes me as greenwashing but I still buy into), although does suggest wine pairings.
What kind of recipes does Home Chef have?
The recipes and ingredients on Home Chef are notably a little bit more basic than other services. I ended up going with two fairly simple dishes which worked well, although I’d be curious as to how the flavors are on the more global recipes. Each week you get to choose from several options on the list.
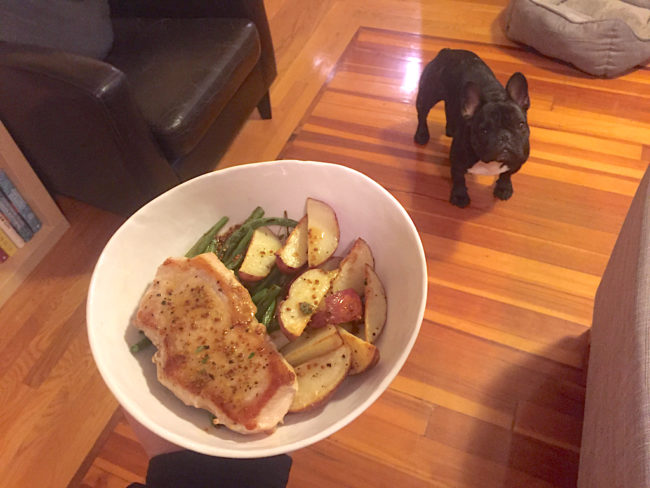
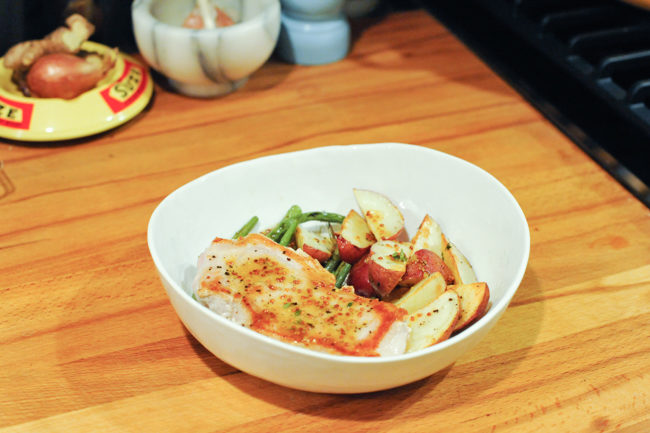
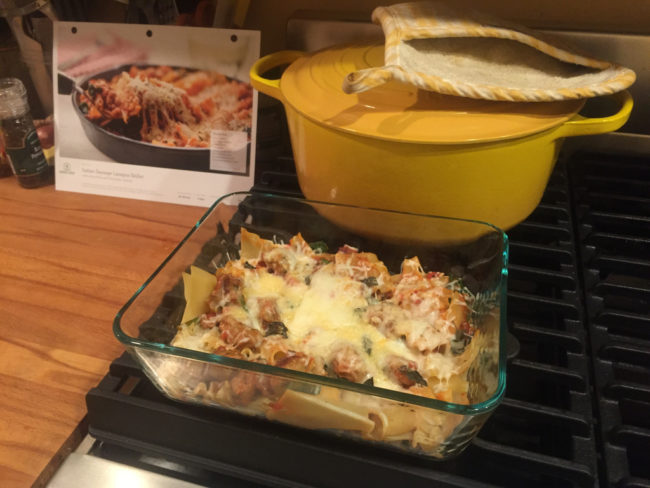
For my box, I chose the grilled pork chop with whole grain dijon sauce, and the Italian sausage lasagna skillet.

How easy are the Home Chef recipes to follow?
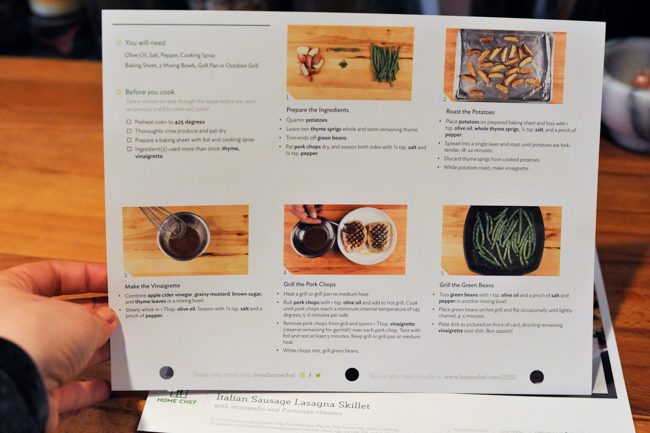
As you can see in the picture of the sheet; the recipes are fairly simple and bulleted. You are encouraged to read through the whole recipe before starting (which is good practice, but always a useful reminder). I found that the recipes might leave a little too much room for interpretation for a novice cook, but I got along just fine. There were a few steps in each recipe that weren’t what I’d have written, but in the end, my dishes turned out alright. For example: the skillet called for “one medium oven-safe pan” although the picture seemed to be of a cast iron, I wasn’t sure what actual size cast iron counts as “medium” (8 inch? 10 inch?), so opted for a pyrex.
Decently quick to cook. Unlike other meal kits, the Home Chef recipes seemed to take less steps and take me less time overall to cook. Each dish was closer to 25-30 minutes of cooking (compared to Blue Apron which routinely had me chopping, prepping, etc. for 45-60 minutes.) Home Chef was closer to the promise of ease than other kits that I’ve tried so far.
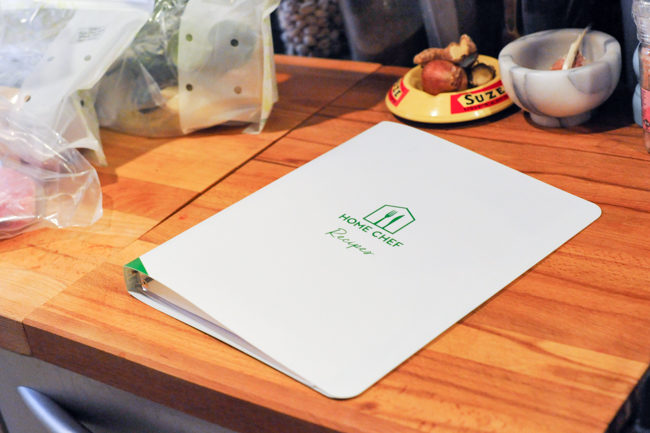
In your first delivery, Home Chef sends you a little plastic binder to save your recipe cards. It’s a little flimsy, but was a nice touch.
What’s in the Home Chef Box?
Aside from the recipe cards, the box itself is filled with individual bags – one for the combined meats, and then individually packaged bags for the separate meals themselves which include all produce, spices, etc.
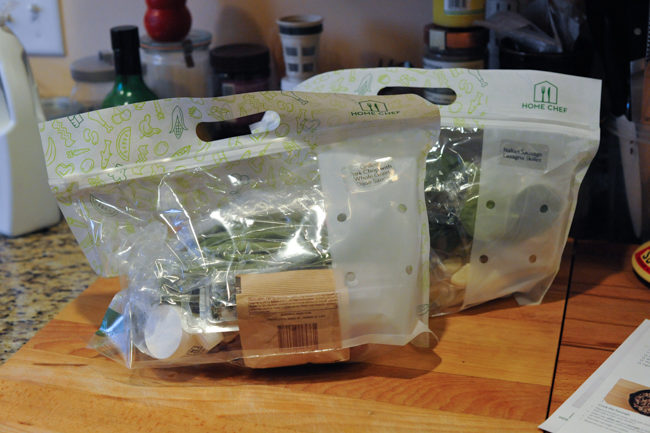
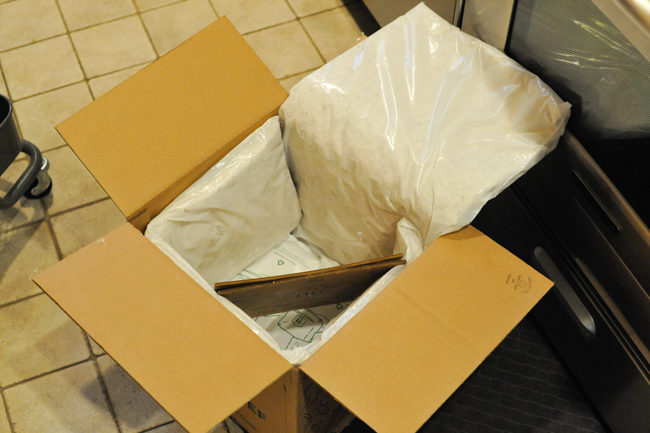
* Packaging – I’m not sure that anyone will solve this – it’s about the same size box as Blue Apron; each meal comes in it’s own little plastic bag, and the meats are separated into bags, the box here is filled with an icepack, and a soft plastic material filled with batting of some type. Still a PITA to break down and recycle, but what can you do?
I’ll note here that my Frenchie Bertram is not afraid of much in life, with the clear exception of cardboard boxes from meal kit delivery services. Which he wanted to let me know was NOT OKAY for me to put on “his gel mat bed” in front of the stove while I took this photo. If I could have added the audio file from his complaints here, I would have.
How much food is in each Home Chef box? Is Home Chef healthy?
Portion Sizes – appropriate for two light-moderate eaters. I was still hungry after both dishes. I tend to supplement meal kits anyway with more vegetables, but volume alone wouldn’t have been enough for me to be satisfied, even though calorically the dishes were in the 500-700 calorie range. I’d love to see more vegetables to round out the dish.
Nutrition: the recipes themselves do have ingredients and high level macros listed (calories, carbs, fat, protein and sodium) for those interested in tracking. You can choose from a variety of different diet preferences, including vegetarian, low carb, and calorie conscious meals.
Other notes: I had to email customer service to move my first deliver date (before cut-off) because I ended up having a last minute travel situation. They were quick, competent, and pleasant to deal with.
The Bottom Line:
Did we enjoy the Home Chef meals? Yes. Both meals tasted good. The pork dish was slightly better looking in presentation, but flavors were very good with both. As mentioned above, would have liked a little bit more vegetable for volume! I think overall I prefer a slightly more spiced and creative dinner if ordering a meal kit, but Home Chef does deliver on overall taste if you don’t mind a slightly boring meal.
Would we order Home Chef again? Possibly. I haven’t actually canceled the service, so it’s quite likely that I might try another box to compare and update this review.
Want to read more meal kit reviews? Here’s my comprehensive review of several months worth of Blue Apron meals, and I’ll be updating this post as I try more kits.
by Sam Tackeff | Nov 26, 2014 | Baking, Condiments, Ingredients, Quick and Easy
I started preparing for winter this week. A puffy vest for was acquired, which I will now live in, and a new coat – an extra layer that I know I’ll be needing. Somehow, I’m never fully prepared for the weather.
I’ve been trying to make my way through several books that need to be finished before I can read new ones – Thrive by Ariana Huffington, I Am Malala, and a handful of others. I started Jo Nesbø’s The Bat but it wasn’t what I expected it to be. Fortunately it’s short, so I’m powering my way through it.

These leaves are now covered by a good layer of ice and sludge that have been accumulating today – what a difference a few days can make. I’m trying to prepare myself for a world of ice and salt and knocking the snow off of my car.


The leaves were stunning this week. Hanging on. Visually, this is my favorite time of year. Emotionally, it’s a little bit of a roller coaster – bracing myself for the long cold winter. I’ve been trying to do a little more to prepare this year: getting someone to help us with a deep cleaning of the house, acquiring new heaters so that we don’t freeze when our old steam heat fails us. A few months ago I won a new blanket, massage gift certificate, and a light alarm from the Tart Cherry Marketing board, and they’ve been particularly useful this week! (Always enter contests if you like the prizes!)


Somehow there is new growth.


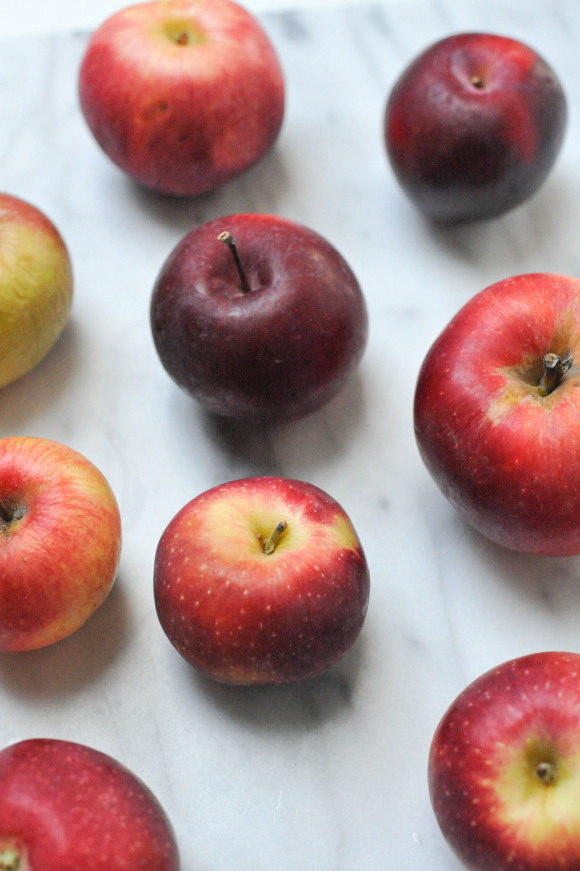
And apples. Which of course I use to make applesauce when I can. It’s such a comforting food.

Applesauce, many thoughts.
Applesauce. It’s one of those things that takes no time at all – a half hour maybe? Makes your house immediately smell like the holidays, and provides you with comforting sustenance. It’s the most beautifully simple thing to make. You really only need apples and a little water, and you can make something perfectly good.
When I set about making applesauce, I usually make a small batch – 5 or 6 apples. You can make a huge batch, but I like to cook in a small pot, and change up my spice mixes. This allows you to make this recipe many times in order to try out what you like and what you don’t.
I like to use a blend of apples. I like my apples on the tart side. My favorite as a child was always the McIntosh. This batch had a few Empire apples, a few Macoun.
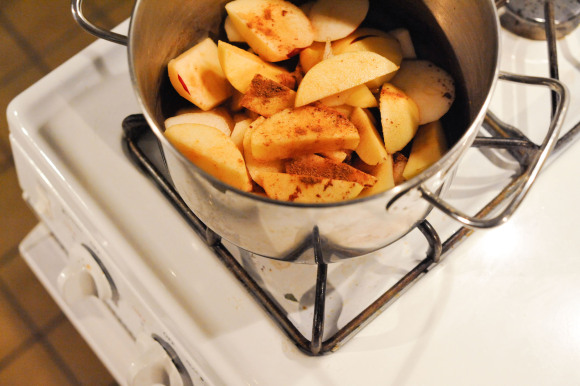
I take apples, and I peel them. I cut out the cores, and slice them. Sometimes I leave a little peel here and there, you don’t need to be perfect. You also don’t need to peel them. If you leave the peels on, your applesauce will become rosy.
You’ll want an acidic component – this can help the apples from browning, and also will provide the flavor with some snap. I’ll sprinkle my apples with the juice of a lemon. (But I don’t always remember, and it turns out okay without, too.)
In a heavy bottomed pot (you don’t want anything to burn), put your sliced apples. If you want a sweeter applesauce, you can put in some brown sugar, maple syrup, maple sugar. Just a few spoonfuls, don’t go overboard. If you are adding sweetener, I also like to add a pinch of salt.
Here I’ll choose my spices – if you don’t have many choices, go for cinnamon. You can put a little – maybe a teaspoon, to a few tablespoons, for a deeply spiced sauce. Sometimes I do a tablespoon of pumpkin pie spice. Chai spices are good, too.
You’ll want a liquid to get things started. A cup or so of cider, apple juice, or water. You could also do wine! For this batch I did 3/4 cup of water, and about a quarter cup of honey mead!
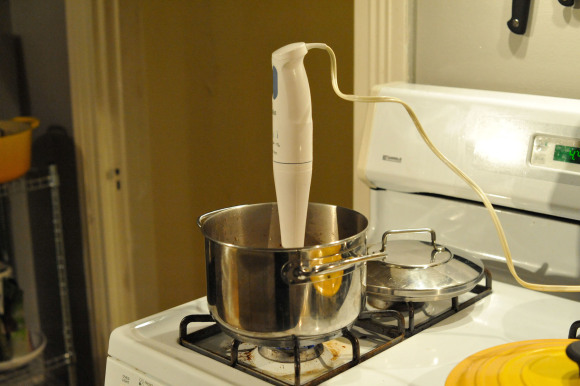
Cook the apple liquid over medium heat, covered, making sure to stir every so often to let the apples soften. You can let it cook for longer, but make sure to turn the heat down to low. When I’m in a hurry, I’ll cook it for 30 minutes.
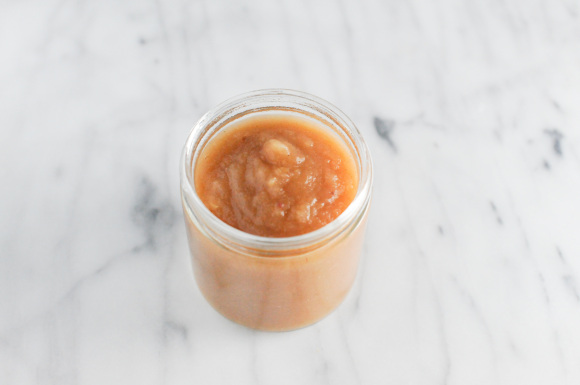
When the apples are cooked through and tender, mash with a fork for a chunky texture, or purée with an immersion blender for that smoother sauce.
Eat it warm, or cold. Store in the fridge, or in the freezer to preserve the bounty for longer. (Of course you can put it up, too, but I like doing that with a larger batch.)
Applesauce (the short recipe)
3 pounds assorted apples, peeled, cored, and slice
1/2 cup of liquid: apple juice, apple cider, water, or a combination
1/4 cup honey mead (totally optional)
2-3 tablespoons maple syrup (or brown sugar)
2-3 teaspoons mixed spices (cinnamon, allspice, pumpkin pie spice, nutmeg)
Combine all the ingredients in a heavy bottomed bot, and cook on medium heat, covered, stirring every so often for 30 – 60 minutes until apples are soft. Mash with a fork, or puree with an immersion blender.
by Sam Tackeff | Oct 2, 2013 | Books, Challenge, Italian, Pantry Staples, Quick and Easy
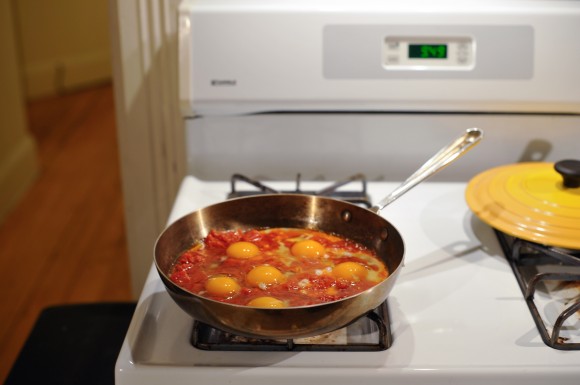
Marcella Hazan, the iconic Italian cookbook author died this weekend, and like so many other food lovers, I’ve done the thing that seems the most fitting – taken to the kitchen to cook recipes in her honor. Starting with her famous tomato sauce. {Here’s a link to her obit in the NYTimes, and here’s the bible: Essentials of Classic Italian Cooking – an oft consulted tome from my bookshelf.}
This is a meal I come back to again and again in various incarnations: Israeli Shakshuka, or Turkish Mememen, or with Mexican flavors sort of Ranchero style, or Greek style with lots of feta – it’s such versatile and quick meal, and lends itself to all sorts playing in the kitchen. (Usually I like to cook my own sauce, like Marcella’s here, but in a pinch, I’ll use Rao’s marinara, and the meal will come together in five minutes.)
Eggs simmered in Marcella Hazan’s tomato sauce
2 cups tomatoes
1 medium onion
5 tablespoons butter
a good pinch of salt
2 – 3 eggs per person
First Marcella’s sauce, which, is perhaps her most famous recipe, likely because it has only four ingredients – and some people don’t even count the salt so we’ll call it three ingredients – but also, because it’s exceedingly delicious for so little effort. Here’s what you do: take 2 cups of tomatoes, with their juices – she recommends fresh, or a 28-ounce can of imported San Marzano whole peeled tomatoes, although, admittedly this time I had a single 15 ounce can of diced tomatoes from Trader Joe’s, and it turned out fine – and you put it in a small sauce pan. Peel a medium onion, chop it in half, and add it to the tomatoes, and then put in five (yes five) tablespoons of butter, and a good pinch of salt. Gently bring to a simmer on medium heat, and cook it uncovered for 45 minutes, stirring every so often. Do a taste check – does it need more salt? Before you serve, you’ll season, and then get rid of the onion – it’s done it’s job. You can use this sauce for pasta, or over chicken, or with some sausages, or with vegetables, or simmered with eggs.
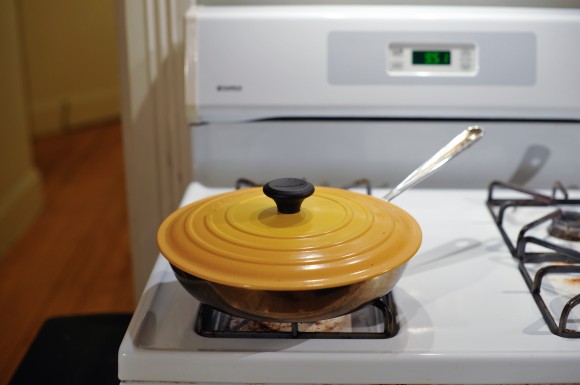
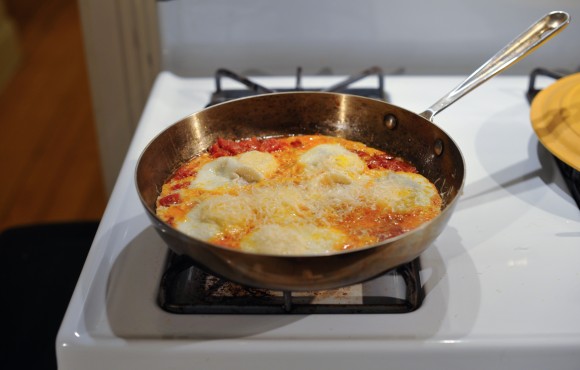
To make the eggs – put the sauce in a large, shallow pan, and cook until warm. Make a few holes in the sauce with your spoon, add the eggs – I’ll do three eggs per person, and share the entire sauce recipe between the two of us – and cover the pan until the eggs set, about 4 minutes. Serve as is, or top with a healthy grating of Parmigiano.
by Sam Tackeff | Apr 14, 2013 | Pantry Staples, Quick and Easy, Vegetables

I was going to share this recipe last week, but then noticed that Ken and Jody had a wonderful post on Romesco with Grilled Spring Onions, and I suffered a short bout of blogger envy. Mine is the quick version, but be sure to swing over to theirs and check out the gorgeous photos – and then go ahead and make some Romesco! It’ll take you ten minutes, and you’ll be happy all week long.
* * *
I’ve really been enjoying the new era of Bon Appétit with Adam Rapoport at the helm. It feels like they’ve made a good comeback and successfully refreshed themselves. The creative direction feels modern and relevant, and they have been taking chances on some great up-coming photographers. (It was a treat to see the work of Kimberley Hasslebrink and Brian Ferry in recent issues.) Lately I’ve been really excited for each issue to arrive – and when it does, I find myself flagging multiple recipes to try, and actually heading in the kitchen to cook them.
As part of this year’s kitchen resolutions, I’ve been trying to make a new sauce every week – sometimes a pesto, salsa verde, or chimichurri. Or even a good mayonnaise spike with fresh herbs and garlic. Having a sauce on hand is a good incentive to cook when you are feeling uninspired – you know you already have one component finished, a perfect accompaniment to chicken, roasted vegetables, spooned on eggs, or to refresh leftovers.
A few months ago I had flagged a segment of the magazine called “Master Fresh and Easy Sauces”, which had an entire selection of sauces I’d be interested in eating: Romesco, Green Harissa, Avocado-Lime Sauce Vierge, Kimchi Relish, and Charred Lemon-Shallot Chutney. The Romesco made the cut because I had all of the ingredients already in my pantry.
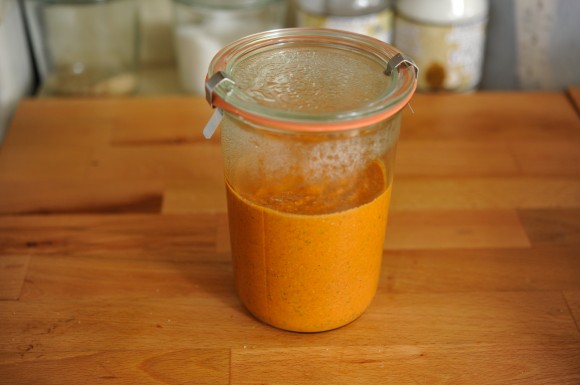
Romesco
adapted from Bon Appétit January 2013
(Recipe by Soa Davies)
The original recipe called for one large pepper, although I used 1/2 the jar from Trader Joes (about 3 medium ones), and substituted almond meal for toasted slivered almonds. I think you’d get a little bit more depth from toasting, although frankly I found that the sauce had enough punch without. For the tomato purée, I’ve used both Italian passata and Trader Joe’s tomato sauce in the can with success here.
1 large roasted red bell pepper from a jar
1 garlic clove, smashed
1/2 cup almond meal
1/4 cup tomato purée
2 Tbsp. chopped flat-leaf parsley
2 Tbsp. Sherry vinegar
1 tsp. smoked paprika
1/2 tsp. cayenne pepper
1/2 cup extra-virgin olive oil
sea salt and freshly ground black pepper
In a food processor, pulse the first 8 ingredients until finely chopped, and add slowly add olive oil until smooth. Or, if you can’t exercise patience, put all of the ingredients into a large cup, and blend with your immersion blender. (Quick, less to clean, and just as delicious.)
Makes 1 1/2 cups. Keeps in the fridge for a week.
by Sam Tackeff | Apr 8, 2013 | Condiments, Pantry Staples, Quick and Easy
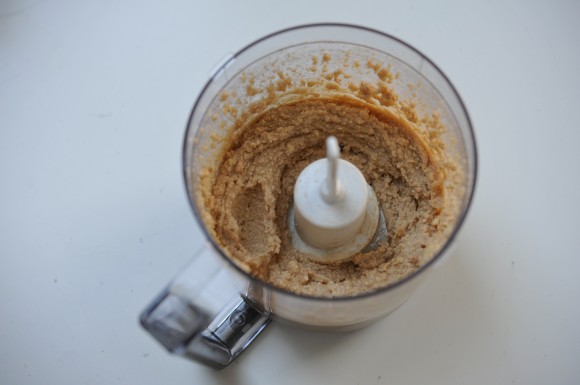
A few years ago, after working on Karen Solomon‘s book ‘Can It, Bottle It, Smoke It‘, I became a home made condiment convert. The secret about condiments is that they usually have no more than a handful of ingredients and come together in a television commercial break. Which doesn’t matter any more because of the miracle of the DVR – but believe me in high school and college, many foods were deemed suitable or not based on how much prep I could do during a two minute interlude while watching Buffy or ER.
I’m not saying that everyone should be making their own coconut milk or marshmallows (although, frankly both are doable and fairly easy). But nut butters, ketchups, and all sorts of sauces are my favorite things to cook, and turn out so much better than the packaged variety. And yet… I still am tempted to pick these things up and put them in my basket at the store – because those are the things you never want to run out of. To remedy this, I put together a little condiment calendar, of special things I wanted to try to make at home. My goal is to make a useful condiment in bulk at least once a month. For a while it was once a week, but I like making achievable goals and then outdoing myself.
So nut butters. From start to finish, no more than 10 minutes, and you have glorious, fresh nut butter, which you can flavor however you’d like.
Truthfully, it had been a while since my last nut butter batch. And then I joined a gym challenge where pre-packaged nut butters, nut milks, and any sort of additives were verboten. We were however allowed both nuts and coconut oil, and our kitchen – so this week I whipped up a batch of cashew butter with coconut and cinnamon. (I was tempted to make my own fresh coconut milk for curries, but I thought that would be pushing it with the rules and the spirit of things.) I’m actually better at portioning out nut butter than I am nuts – I know that 2 tablespoons of nutter butter is a serving and not to go over – but three and you are pushing that. Give me a handful of whole nuts, and I’ll go back for handful after handful, until I’ve eaten the entire bag.
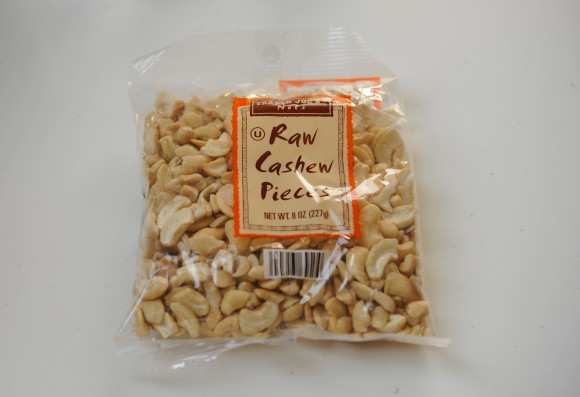
So cashew butter. I like cashews because they are creamy and naturally sweet, and make a great unsweetened paste. You can make your own nut butter of any type – almonds, pecans, pistachios and hazelnuts all are great. You can use walnuts, although I find walnuts to be slightly bitter for my taste.
Usually I pick up these raw cashew pieces from Trader Joe’s. They are cheaper than the whole cashews, and come in a convenient 8 oz. package, which is more than enough for a batch for one person.
You usually need a little bit of fat to blend the nut butter – I like melted coconut oil because it gives it a hint of coconut taste, without tasting overtly coconut-ty. If I were making a savory nut butter (have you had one before? It’s interesting!), I might use olive oil. With cashews I like adding a little bit of vanilla, cinnamon, and salt. But you can also add cocoa powder, and make your own Nutella – if you want to get fancy, add a little bit of chile powder.
Another seasoning trick is to find a good recipe for spiced nuts – you know, the kind your grandmother used to serve with cocktails – and then just blend them into a nut butter.
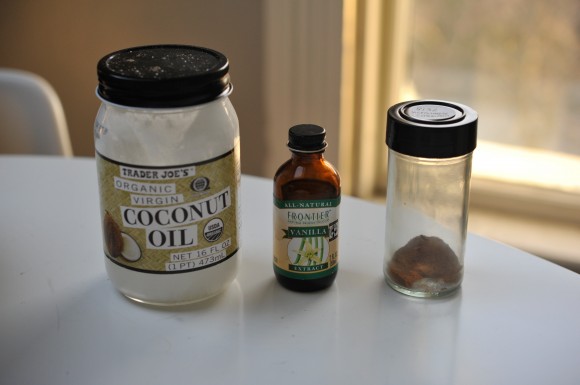
For this batch I kept it simple.
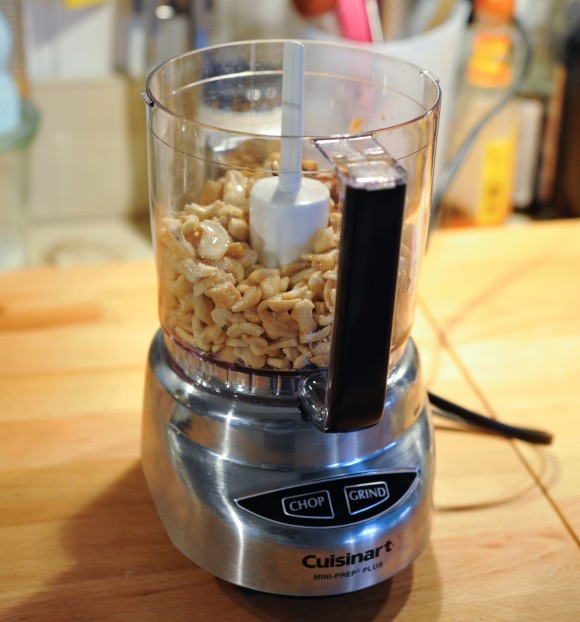
Into my baby Cuisinart Mini-Prep (on sale at Amazon for 47% off) – this thing is a workhorse, and perfect for a small household. And you can dish wash!
Blend, blend, blend.
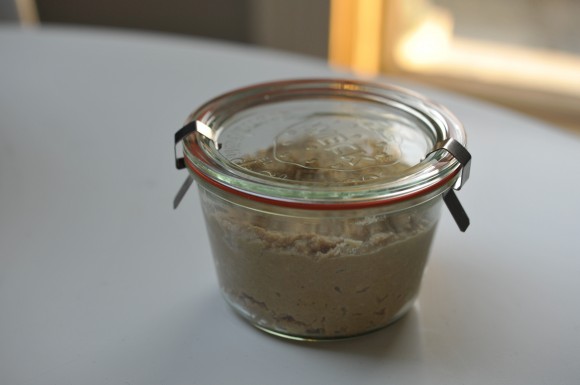
Homemade Cashew Butter
This nut butter is best made with raw cashews, which you can purchase at Trader Joe’s for an affordable price. I typically make a small amount – about a cups’ worth – primarily to avoid eating several cups worth of nut butter in a single week. The recipe is easily double-able, and I’d actually recommend doubling if you are using a larger food processor, as the small amount won’t blend as well.
8 oz. raw cashews (225 grams)
1/4 cup coconut oil, melted
1/2 teaspoon cinnamon
1/2 teaspoon vanilla extract
a pinch of salt
In the bowl of a small food processor, place the cashews, cinnamon, vanilla and salt, and pour over the melted coconut oil. Pulse to get the mixture started, scraping down the sides with spatula. You want to get the nut butter going, and then grind for a minute or two at a time, until a smooth paste is formed. I usually do a minute on, scrape the sides, another minute, scrape, a third minute – you can do it for a few extra minutes if you want a very smooth paste, but I like mine a little bit chunky. It also helps to give your processor 30 seconds of rest if the motor is overworked.
You can store this in the fridge for a few weeks but it’ll firm up. I’m okay leaving it out on a cool countertop for a few days – which is as long as it’ll last in the house.
Makes about 1 1/4 cups.
by Sam Tackeff | Feb 28, 2013 | Poultry, Quick and Easy, Vegetables

So there was a snow storm three weeks ago. Nemo – I’m sure you heard of it. It was officially named by the Weather Channel, much to the chagrin of the National Weather Service. But three weeks ago – that’s about the last time I sat down at my computer to relax. (These are some of the photos I took of the storm!)
The week of Nemo I joined the team at RunKeeper – as a project manager leading globalization efforts! Beyond the job itself – which is absolutely thrilling – I’m most excited about working with a team of people who are kind, silly, and have a lot of fun together. I knew I would be in good company when in my exhaustive interviews I met cookbook lovers, people excited about home sausage making, home brewers, and another whose wife runs a small CSA/recipe club.
This week confirmed it, when our Hackathon had us working on crazy projects, and suddenly I found myself recording audio on ProTools (something I’d never done before), and dressing up as a “real runner” in order to properly make a fool of myself infront of my new coworkers. It paid off – our team won prizes in the “Audio” and “Best Demo” categories, and I personally won a Nerf gun.
The transition has been a little bit jarring – all of a sudden I’ve been thrust back into a daily grind, and it has been a challenge feeding us healthy meals, without resorting to more takeout.


Thankfully, not every night has been a wash. Here are a few of my favorites – easy meals that I put together quickly while I set about getting other things done.
Roasted sausages + Brussels Sprouts: the sausages are garlic thyme from M.F. Dulock (part of my Meat Club subscription). I usually keep extras in the freezer to defrost and cook when I really can’t bother to do any other work. They went into the skillet with a few cups of brussels sprouts doused with some olive oil, salt, and pepper at 350F, and after about 20 or 25 minutes I flipped over the sausages, agitated the brussels sprouts, and roasted for another 25 minutes, until the sprouts were soft and a little bit crispy.

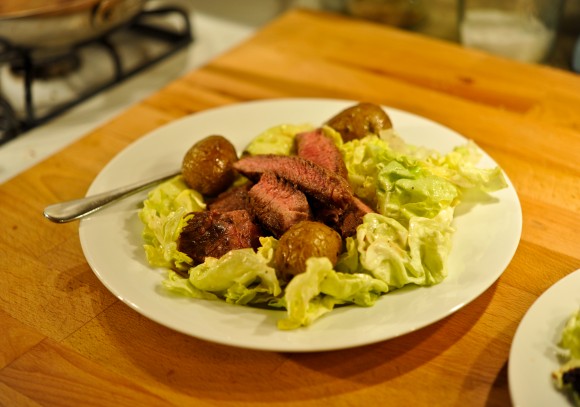
Steak Salad: I don’t usually cook steaks for dinner, because they are expensive, and I’m happier with good quality ground meat or cheaper stewing or braising cuts for my meal. But sometimes, they show up in Meat Club, so I’m “forced” to eat them. Having not eaten enough vegetables, I opted for steak salad.
I seasoned the steak with salt and pepper, and seared it in a little bit of butter in the skillet. This was a thin steak, so it cooked in about 3 minutes on each side.
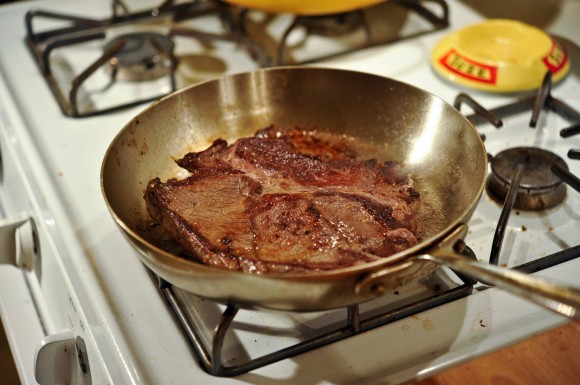
I let the steak rest as I heated up some leftover roasted baby potatoes, made a quick sharp mustardy dressing, and tossed it with some butter lettuce.
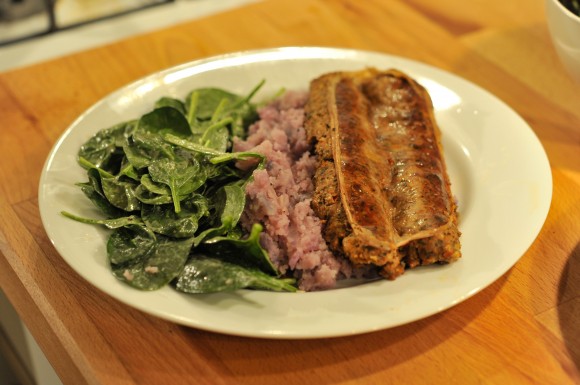
And then there was sausage night two (do you see a theme here?) This was a spicy Italian sausage, freshly made at the butcher, which I served with some mashed purple potato, and a spinach salad.
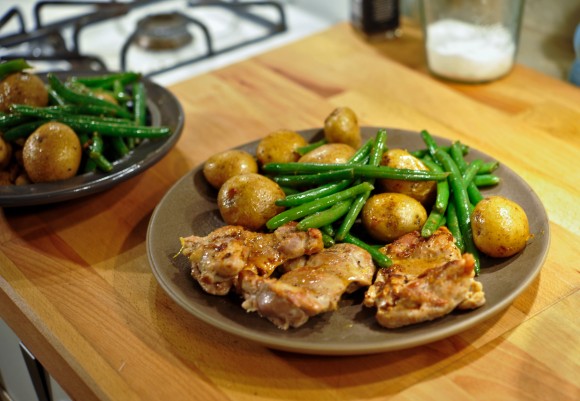
And finally, quick garlic chicken thighs, with more of those leftover roasted baby potatoes (another theme!), tossed with some steamed green beans, and a lemon-anchovy vinaigrette. The chicken is simply coated with salt, pepper, and garlic powder – yep, garlic powder. It forms a crispy crust that you can’t get from the fresh allium – and cooked on the stovetop in a little bit of coconut oil, about 7 minutes on each side, until cooked through.
This week, there were a few too many meals out… erm… most of them, but I’m looking forward to getting back into the swing of things!


