by Sam Tackeff | Mar 30, 2009 | Baking, Challenge, Daring Bakers, Italian, Pasta
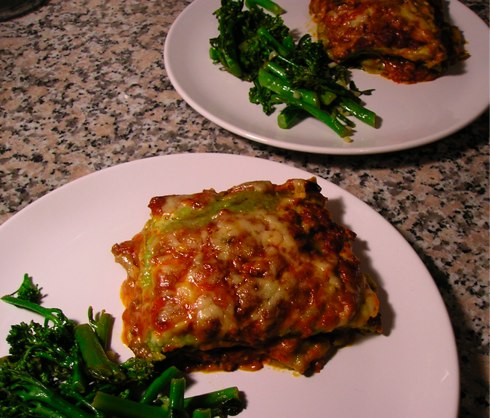
Daring Bakers. The March 2009 challenge is hosted by Mary of Beans and Caviar, Melinda of Melbourne Larder and Enza of Io Da Grande. They have chosen Lasagne of Emilia-Romagna from The Splendid Table by Lynne Rossetto Kasper as the challenge.
Every month, hundreds of bakers across the world band together in an effort to push their own culinary boundaries. Daring bakers is certainly not thirty minute meals. This month, we were making lasagna of Emilia-Romagna, a three part adventure which included home made spinach pasta, a home made ragu, and a creamy béchamel.
Ok, I thought. I’m going to make lasagna from scratch this month. Well I have another confession to make. I really, really, really enjoy Stouffers lasagna. Somehow, even after microwaving the stuff instead of baking it, it fulfills my every need and want. Somehow, this microwave boxed food is entwined with thoughts of Italian grandmothers slaving away in the kitchen, and remarkably the deception pulls itself off. Somehow, even though it pains me to say it, I love the stuff. So the idea of making a real lasagna, all from scratch… a challenge that would no doubt be fun to make, and delicious, was intriguing… but could it beat my trusty standby? You laugh, maybe you even scoff, but I was skeptical.
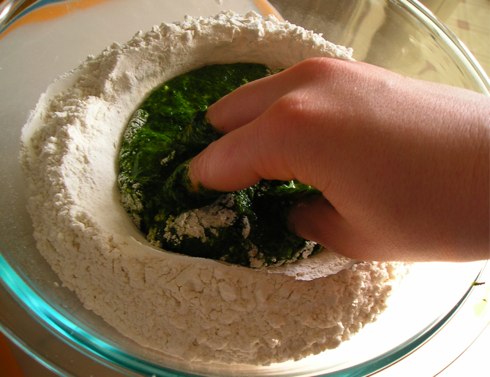
Challenge part #1: Homemade spinach pasta. Home made pasta is incredibly easy to make. You take just a few ingredients, usually just flour and egg, and mix, knead, roll, and voila- just a few minutes in a boiling pot of water, and done! The only difficult part: rolling out the dough. I’d highly prefer doing it with a Kitchen Aid mixer with the pasta attachment, but alas, all I have here is my own forearms, and a nice silpat rolling pin.
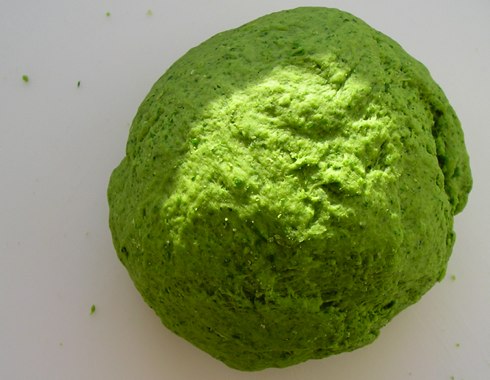 Another wonderful bonus of home made pasta is that the pasta dough is another good place in which to hide vegetables in for the picky eater. For this pasta, I used two eggs, 3.5 cups of flour, and I added spinach, about 6 ounces of defrosted frozen spinach, which I had emulsified with my hand held emulsifier. This makes the paste smooth, and easily workable into the dough. If I were to do this dish again, I’d probably add some basil as well, but you could easily puree any vegetable and add it to a basic dough.
Challenge part #2: A delicious ragu. For this part, I did a cheat move, using jarred pasta sauce as a base. I added meat, and cooked it for about an hour, so ultimately it doesn’t save any time, just imparts some fantastic flavor. Yes, part of it was jarred, but I don’t feel bad. The stuff is delicious.
“Cheats Ragu”
1/2 onion
an ounce of bacon
1/2 lb ground veal
1/4 cup of red wine
a jar of really good store bought tomato sauce
(I used Trader Joes Rustico- Southern Italian sauce), but I might easily have substituted barilla.
Saute the onion for about ten minutes, with some good olive oil. Add the bacon, and saute, add the half cup of wine, and cook for a minute, dump in the jar of pasta sauce. Cover really loosely (more of a stain catcher), and stir occasionally, cooking at a slow bubble for about 45 minutes or more.
Challenge part #3: A Bechamel (white sauce) This is the key to a rich, hearty lasagna. In a medium saucepan, melt 4 tablespoons of butter, and then sift in 4 tablespoons of flour, whisking it all until smooth. Slowly whisk in 2 2/3 cup of milk, whisking constantly to avoid lumps forming. Bring to a slow simmer, and stir until the sauce thickens, about seven or eight minutes. Season with salt, pepper, and most importantly some freshly grated nutmeg. The nutmeg imparts the most wonderful flavor that gives the whole lasagna something special.
Finally, with the three parts prepared, I put together the lasagna, layering the (boiled) pasta, sauces, and some freshly grated parmesan, and baked it all (covered loosely with foil) for 40 minutes at 350 degrees F.
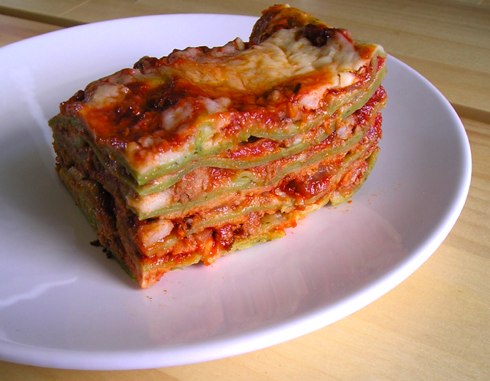 Ultimately, this lasagna was delicious. Painfully delicious. As in my forearms. All of the rolling. I spent three days eating it, hot, cold, microwaved, for breakfast, until I could lasagna no more. Was it better than my Stouffers? Er… Yes. Would I make it again? Yes. Although, probably sooner if I had a Martha Stewart Blue Kitchen Aid Mixer. (Hint, hint…. nudge, nudge…) Until then, I’ll savor this experience.
Aside: If anyone is interested in slaving away recreating this, I have the longer, much more detailed recipe for the pasta and assembly that I would be more than willing to email.
by Sam Tackeff | Feb 26, 2009 | Baking, Barefoot Blogging, Challenge

A few weeks ago, I discovered Barefoot Bloggers, a group of people who love Ina Garten, the Barefoot Contessa, just as much as I do, and who have joined together to cook through her marvelous recipes. The next recipe on the list was Ina’s Meringues Chantilly, chosen by BMK of Reservations Not Required Fantastic! I love meringues! But the question was, would it be possible to make it in my kitchen in time to post today? You see, there are rules about meringue. Fresh eggs! Metal bowl! Only on a sunny dry day! That was the one I was the most worried about…. this is San Francisco… a sunny dry day? Oh dear.
I scanned the recipe list.
My first challenge: Cream of Tartar. Hmmm.. I’ve always had cream of tartar lying around, but now I don’t have any in my new kitchen. So began the search for cream of tartar. Apparently, it’s not really something that you just buy here. Four stores later, I finally found some overpriced cream of tartar and bought it. There is nothing like spending six dollars for something you are going to use a quarter teaspoon of. Sigh.
The next part was the eggs. According to the experts, you need the freshest eggs, to help break down the protein in the whipping process. I got mine from Omnivore Books on Food, where Celia, the owner sells fresh eggs from her neighbor’s farm in addition to her well chosen selection of cook books and books on food. These eggs are the absolute best, with really big orange yolks (which because they were omitted from this recipe are about to end up in a custard).
Now for a metal bowl. I didn’t have a metal bowl, but I had a glass pyrex. Would this work well enough? According to the experts, glass should work fine- the key is not to use plastic, because the fat from previous cooking might stick to it and ruin your meringue.
Finally, Ina’s recipe called for orange liqueur, and framboise, a raspberry liqueur, although all the hard liquor I had in my house is… Seagrams Whiskey. I know. I was the queen of the liquor cabinet. Four years of collecting the finest alcoholic libations in my dorm room, and all I have now is a bottle of whiskey, in a plastic jug no less. Because my current priority is paying my rent rather than paying for the expansion of my liquor cabinet, I opted to substitute the whiskey.
Finally I was ready to make the meringues.
…And it rained hard, down pouring rain for three days. I just couldn’t do it. The experts tell you to avoid moisture- not even to run your dishwasher or boil a kettle!
Just two days ago, the sun broke through the clouds and I was prepared to make the recipe. I went to the cabinet and…. apparently we didn’t have a hand held mixer. How could I forget! Oh god, I’ve whisked meringue before, and it’s a long, arduous process with no real assurance that they will even stiffen into peaks. A quick panic led to the obvious thought- I live in an apartment building now! I could borrow a mixer!! Huzzah!! So, with the great kindness of my neighbor Khrista, the following recipe was accomplished.
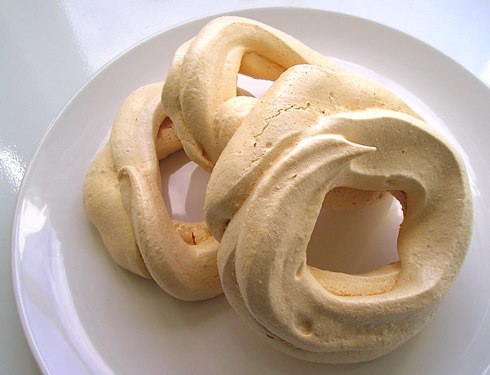
The original recipe is here, but the following was my adaptation that given there are just two of us, would feed a few less than the intended recipe.
Meringues Chantilly
adapted from the Barefoot Contessa
makes 6 meringue cups
Ingredients
– 3 extra- large egg whites, at room temperature (make sure there is no yolk!)
– 1/8 teaspoon cream of tartar
– a pinch of kosher salt
– 3/4 cup granulated sugar, divided
– 1/4 teaspoon pure vanilla extract
– Whipped Cream, see below
– Stewed Fruit, see below (cooled slightly or it will melt your whipped cream)
Method
1. Preheat the oven to 200 Farenheit. Line a baking sheet with parchment paper (or a silpat, or foil, which is all I have and works fine).
2. Beat the egg whites, cream of tartar, and the salt on medium speed until froth. Add half a cup of the sugar, and increase the speed to high until the egg whites form very stiff peaks. Whisk in the vanilla, and carefully fold in the remaining quarter cup of sugar into the meringue.
3. Put meringue into a piping bag with a large star shaped pastry tip, or if you are me, you put it into your ziplock bag in which you have attempted to cut a star shaped tip into one of the corners. Pipe into 3 1/2 inch or so circles.
4. Bake for 2 hours, until the meringues are dry and crisp, but not browned. Then turn off the oven, and wait for four hours, or overnight. Frankly though, I think you can use them right away and they would be fine, if not even better (I like a less dry meringue).
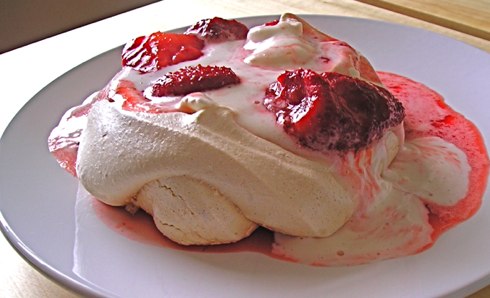
5. On a plate or bowl, spread some of the sauce from the stewed berries, place the meringue, fill with a dollop of whipped cream, and top with the fruit and eat.
Stewed Strawberries:
1/8 cup sugar
1/8 cup water
1 teaspoon whiskey
1/8 teaspoon orange zest
Combine all the ingredients in a saucepan, and bring to a boil. Lower the heat, and cook uncovered for a few minutes, allowing the sauce to get syrupy.
Whipped Cream:
Because I was not making the whipped cream for the entire recipe, I simply used about a 1/4 cup of cream and whipped it until stiff, whipped in a teaspoon or so of sugar and some vanilla, and a tiny bit more of the whiskey. It worked wondrously.
Ina’s recipe though calls for a pint of cold heavy cream, two tablespoons of sugar, two teaspoons of vanilla extract, and a tablespoon of orange liqueur. Well, next time!
by Sam Tackeff | Feb 24, 2009 | Candy, Challenge, Turkish
 Sugar High Friday is a monthly food blogging event created by Jennifer, The Domestic Goddess and is hosted each month on a different food blog. This month’s host for the event is Palachinka, and the theme is “Copycat”, where you copy one of your favorite store bought candies.
I spent a good couple of weeks thinking of the best candy I could copy. Would it be Snickers, my favorite bar candy? Pecan Divinity? Nutella? (I was seriously considering Nutella, until I realized that it would completely ruin any semblance of a healthy diet if I made it and then ate the entire concoction in two days.)
Finally I turned to Turkish candies, because Turkey happens to have some of the best confections: Lokum (Turkish Delight), Dragees (chocolate covered nuts and orange peels), Pişmaniye (a type of wispy candy floss that I can’t describe with any justice). My mother happens to be in Turkey this week, and now that I live across the country from her, I know that I’m going to be depressed when she returns and I get calls of what wonderful things she has brought home. Maybe she will send me a care package (hint).
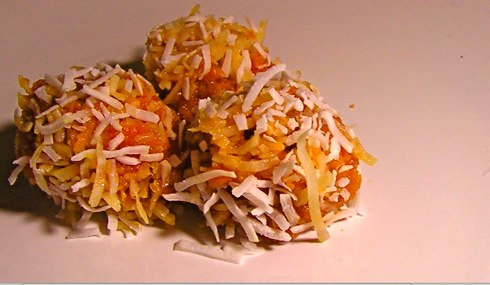
And so, after thinking of all the candies that I wouldn’t be getting, I decided – why not create one of my favorites here at home? I finally settled on cezerye, a Turkish candy made of carrots! Now, although they have a lot of vitamin A and B from the carrots, they also have enough sugar to fully sweeten your blood, so I wouldn’t exactly qualify them as health food, but they certainly are delicious.
Home-Made Cezerye
makes about twenty five candies
Ingredients
2 cups grated carrots
3/4 cups loosely packed dark brown sugar
1/4 cup white sugar
about 1/2 cup water
1/2 cup ground walnuts
1/2 cup ground petit beurre biscuits
1/2 cup shredded dried (unsweetened) coconut
Method
1. Grate a few medium carrots and put into a medium saucepan with the sugar. I simply took my cup measure, loosely packed it three quarters of the way with brown sugar, topped it with the white sugar, and added water to wet the sugar (as much fit in the cup).
2. Simmer on low heat for a half hour or more, covered. Add the ground nuts and petit beurre cookies, and continue to cook uncovered for a few minutes. Take off the stove, and let cool enough to handle the mixture.
3. To make the carrot balls, roll the dough balls in some shredded coconut, as you would if you were making truffles. Place in the fridge for at least an hour, and eat!
These come out a little bit moist, but they should dry as they sit.
by Sam Tackeff | Feb 17, 2009 | Challenge, Cheese, Quick and Easy, Seafood
In an effort to diversify my kitchen productions, I’ve been looking for new food blogger challenges to have fun with. One of my favorite challenges I have found so far is the “Cheese of the Month” challenge from Adventures in Gluttony, which provides a monthly cheese suggestion to create something delicious with.
This month’s featured cheese is feta, which coincidentally happens to be one of my favorite cheeses. I use feta and it’s cousin white cheese (Turkish ‘beyaz peynir’) almost interchangably, the latter being slightly less salty. I usually have a block of feta stored in some fresh water in my fridge, and eat it often plain, for breakfast, with a little slice of tomato and cucumber and a slice of toast with jam. Or, I crumble it on salads, into soups, or even on burgers.
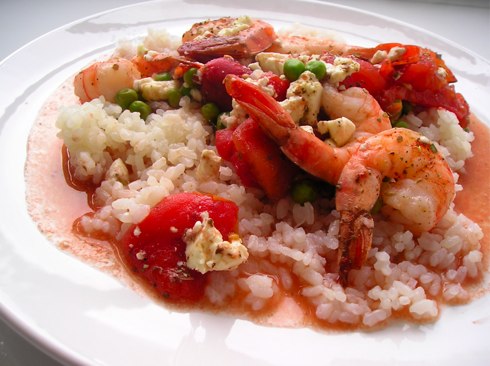
For the challenge I decided to incorporate it into my lunch, baked with shrimp. This is a very loose adaptation of a broiled recipe my mother uses that I love and really should get a hold of, but nevertheless it was quick, easy and very very tasty. The feta I used was Mt. Vikos, which I picked up at Cowgirl Creamery in the Ferry Building in downtown San Francisco. I only used an ounce of feta (all I had left), but the flavor still comes out wonderfully!
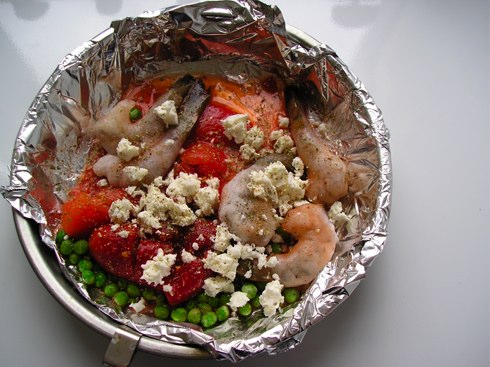
A Quick lunch: Baked Shrimp with Feta
serves 1
Ingredients:
4 or 5 shrimp (I used frozen)
A few small canned San Marzano tomatoes, with juice
1/4 cup frozen peas
1 ounce feta
a pinch salt,
a pinch pepper
a couple of good pinches oregano
Method:
1. Couldn’t be simpler: In a baking dish lined with foil, put all the ingredients, stirring gently to allow the tomato juice to coat everything. Whack it in the oven at 350 degrees for about 25 minutes, until shrimp are pink and cooked.
To serve: I served this over a bed of steamed rice, usually I use brown, but I’ve run out and need to pick up some more. I use frozen single servings of rice that I cook and wrap while still warm, which traps the moisture and allows you to easily pop one into the microwave and eat for lunch as if it was freshly made.


 Another wonderful bonus of home made pasta is that the pasta dough is another good place in which to hide vegetables in for the picky eater. For this pasta, I used two eggs, 3.5 cups of flour, and I added spinach, about 6 ounces of defrosted frozen spinach, which I had emulsified with my hand held emulsifier. This makes the paste smooth, and easily workable into the dough. If I were to do this dish again, I’d probably add some basil as well, but you could easily puree any vegetable and add it to a basic dough.
 Ultimately, this lasagna was delicious. Painfully delicious. As in my forearms. All of the rolling. I spent three days eating it, hot, cold, microwaved, for breakfast, until I could lasagna no more. Was it better than my Stouffers? Er… Yes. Would I make it again? Yes. Although, probably sooner if I had a Martha Stewart Blue Kitchen Aid Mixer. (Hint, hint…. nudge, nudge…) Until then, I’ll savor this experience.


 Sugar High Friday is a monthly food blogging event created by Jennifer,

